Mach4 Configuration - Avid CNC Laser Upgrade
Important: Please make sure that you have the ESS plugin for Mach 4
This section shows the set-up using Mach4 build 4517 and ESS plugins build 266. With Mach4 and the ESS controller, you use PWM power control, and M62/M63 commands to turn on/off the laser as these are designed to be tightly synchronized to the motor movements.
1. Start by setting up the Pins configuration for the PWM and Gate. The PWM is the one that you connect your PWM wire from the PLH3D-CNC Adapter to. This manual used the Port 3, Pin 3 output.
2. The gate is a virtual signal, with no wire hooked to that pin, but it has to be a previously unused pin. This manual used the Port 3, Pin 2 for that purpose.

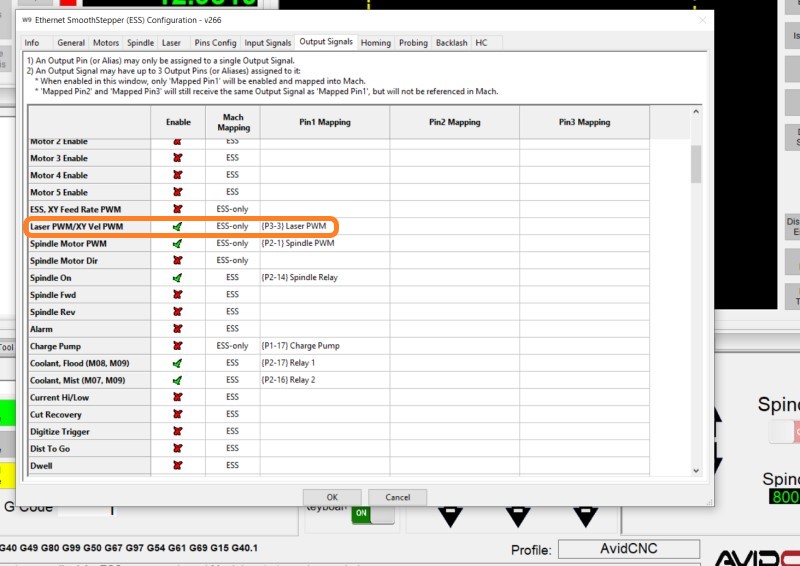
3. In the Output Signals Configuration Window, assign the laser PWM to the pin you previously assigned for PWM (Port 3, Pin 3 was used in this manual).
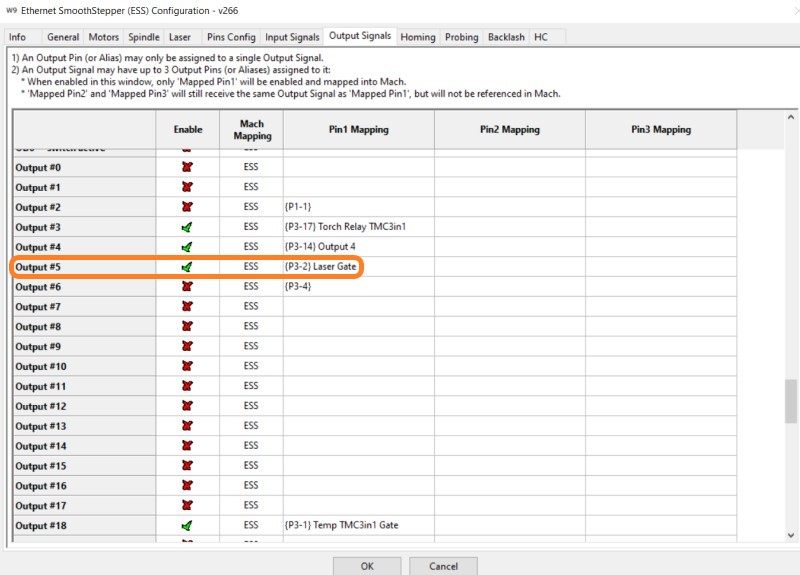
4. In the Output Signals Configuration Window, assign an unused output to the pin you previously assigned as the gate (Output #5 was assigned to the physical Pin 2 on Port 3 in this manual). This pin number is the pin number your M62/M63 G-Code Commands will use.
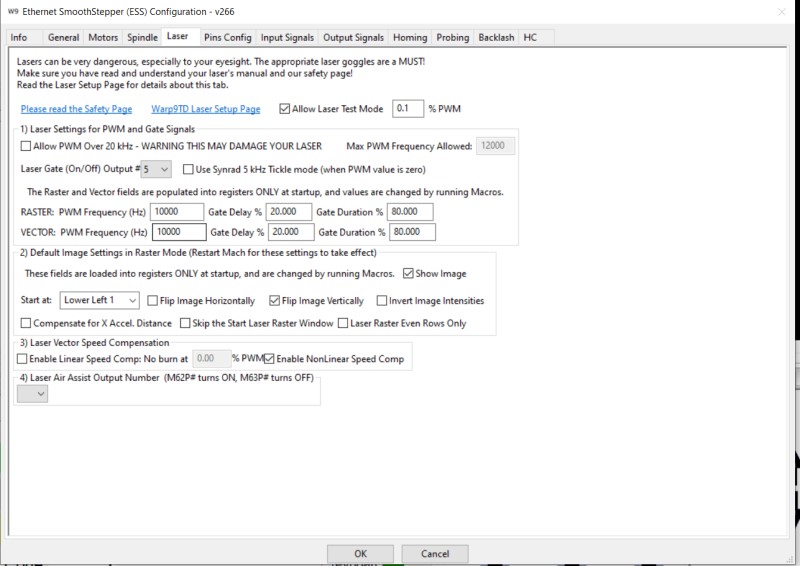
5. Set up the Laser Configuration Screen according to the output pin (#5 here), and the test mode PWM power you want to use.
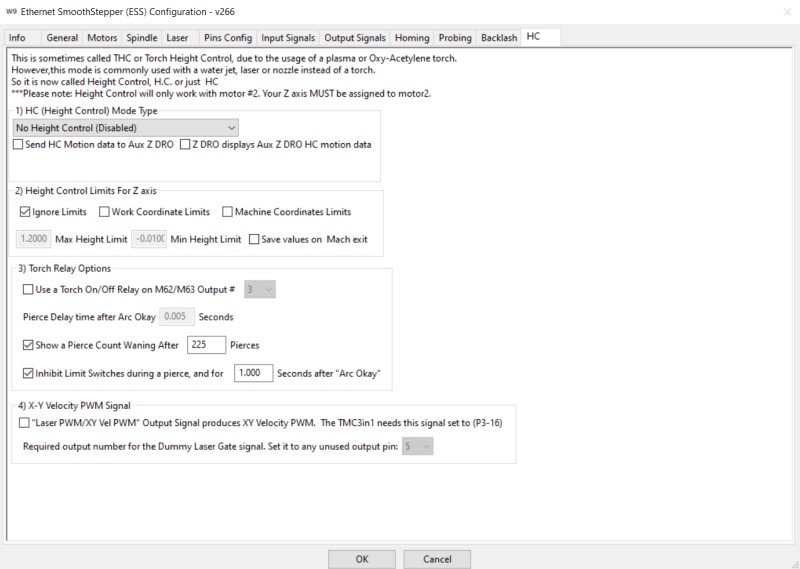
6. Finally, in the HC Configuration Screen, disable the Height Control as it uses the same PWM control that the laser needs. If they are both enabled, the ESS plugins will throw errors.
7. Warp 9 Tech Design's website offers a detailed overview on how to set-up Mach4 in case you need additional information.

2.