CNC Shield and Arduino Laser Upgrade - Software Setup
- Software Setup
- Configuration Arduino UNO
Before connecting Arduino with CNC Shield, GRBL must be flashed to Arduino.
- There are several options for getting GRBL onto your Arduino UNO. This guild will focus on flashing pre-compiled binaries, however you can modify the firmware and flash it yourself.
- See details on all the options at the GRBL Wiki: Flashing Grbl to an Arduino
- To flash a pre compiled instance of GRBL we will need the program
- XLoader
- GRBL pre-compiled firmware v1.1f. 20170801
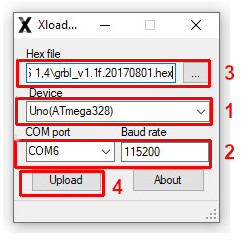
- Run the XLoader program, select Arduino Uno from the Device list (1), select the port to which the board is connected, set the port speed (Baud rate) to 115200 (2), select Hex file and indicate the downloaded file with the GRBL batch (3). Click Upload (4) and wait for the upload to load.
- The next step is to download and install the ARDUINO IDE software from the website of producer.
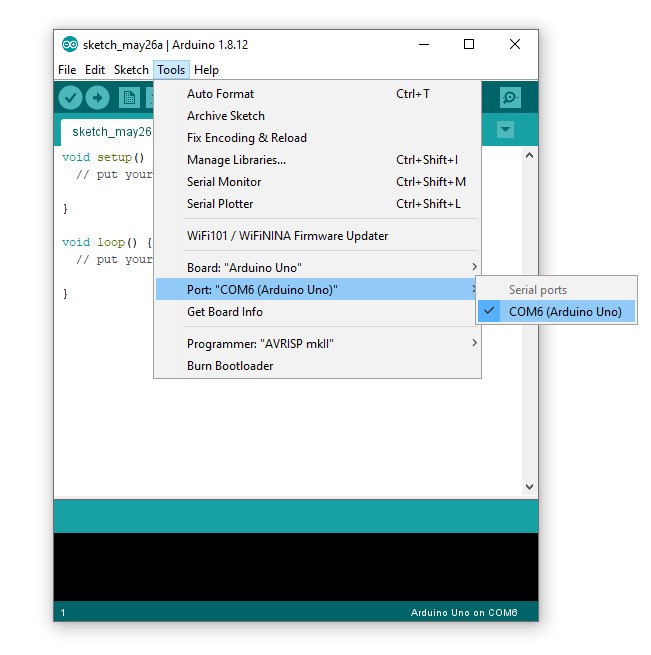
- Tools → Port → select the port number to which is Arduino connected.
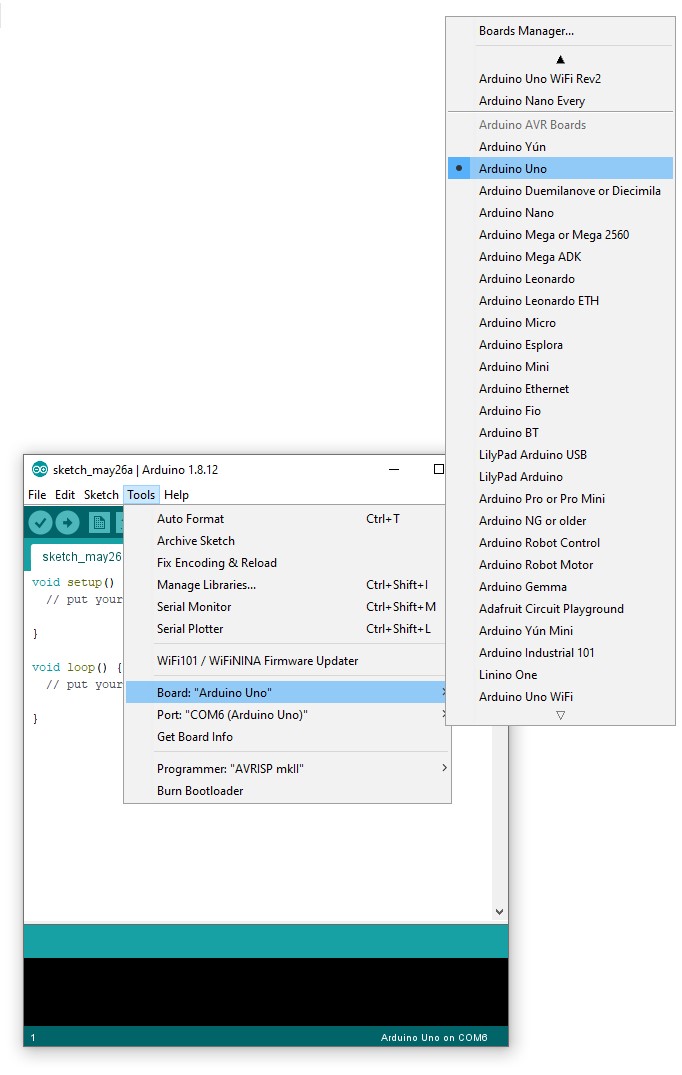
- From the Menu choose Tools → Board: → Arduino Uno
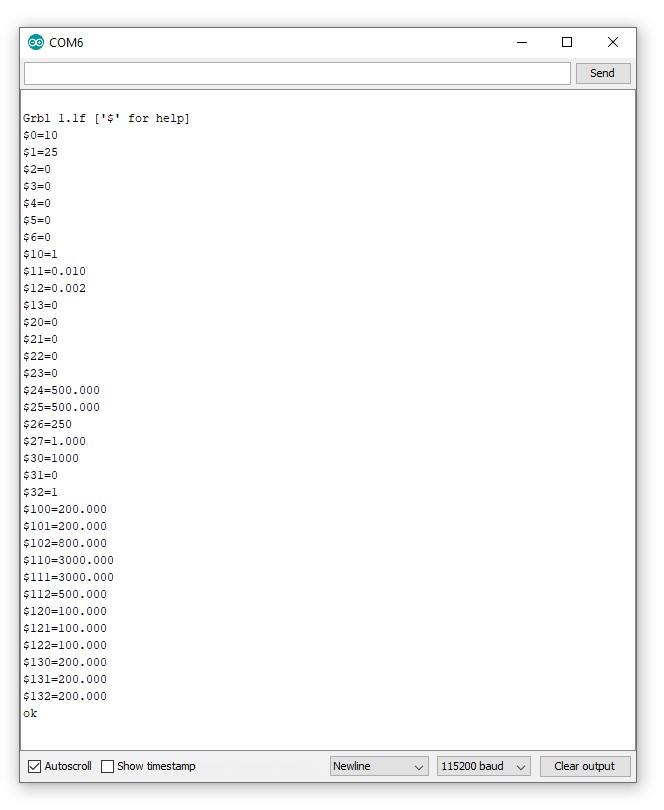
- Click on the "Serial monitor" magnifying glass located in the upper right corner of the program.
- The terminal window will open, if everything went well and the Grbl with the charge won, the message Grbl 1.1f ['$' for help] should appear in the window.

- After entering the Grbl settings appears which is “$”.
- You can configure the parameters of the motors and e.g. the engraving laser head.
Configuration can be done later after connecting the CNC Shield.
- Software configuration
- After connecting to the machine we can try if everything works, for this we will need a program for which we can check the operation of the connected machine.
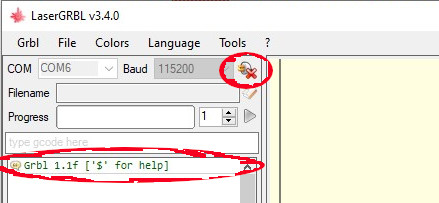
- For this purpose, you can use LaserGRBL with which we can check whether the laser works well
- In the program itself, you can also change the GRBL settings, the important thing is to enable the laser option in the settings.
- We run the program and click on "Connect", should appear information about the connection "Grbl 1.1f ['$' for help]".
- Then click on the menu Grbl → Grbl Configuration and in the settings go to $ 32 and change to 1, which is ENABLE, click on "Write" to save the changes to the settings.

- Now we can open a file with an example image for laser engraving or gcode.