LEAD and WorkBee Laser Upgrade - Mounting Setup
To mount the PLH3D-6W-Series laser head, the following tools are required:
- Small flat-head screwdriver;
- H2.5 hex key;
- H3 hex key;
- H4 hex key;
- 8 mm spanner;
- A few zip ties (optional).
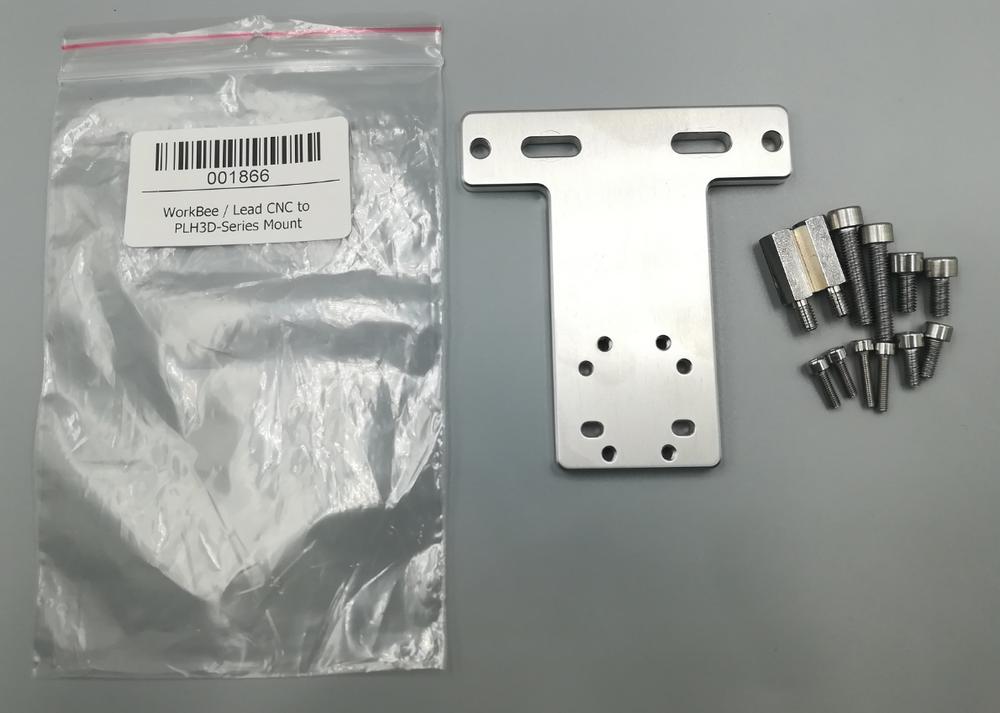
1. Unpack the LEAD PLH3D Mount. All necessary screws have been provided.
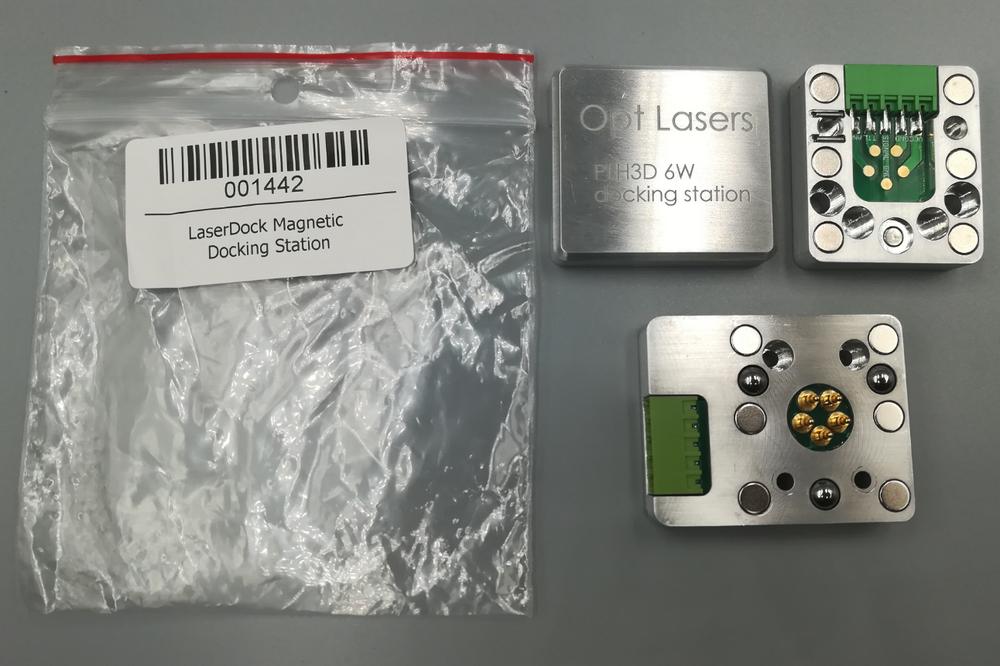
2. Unpack the LaserDock Magnetic Docking Station.
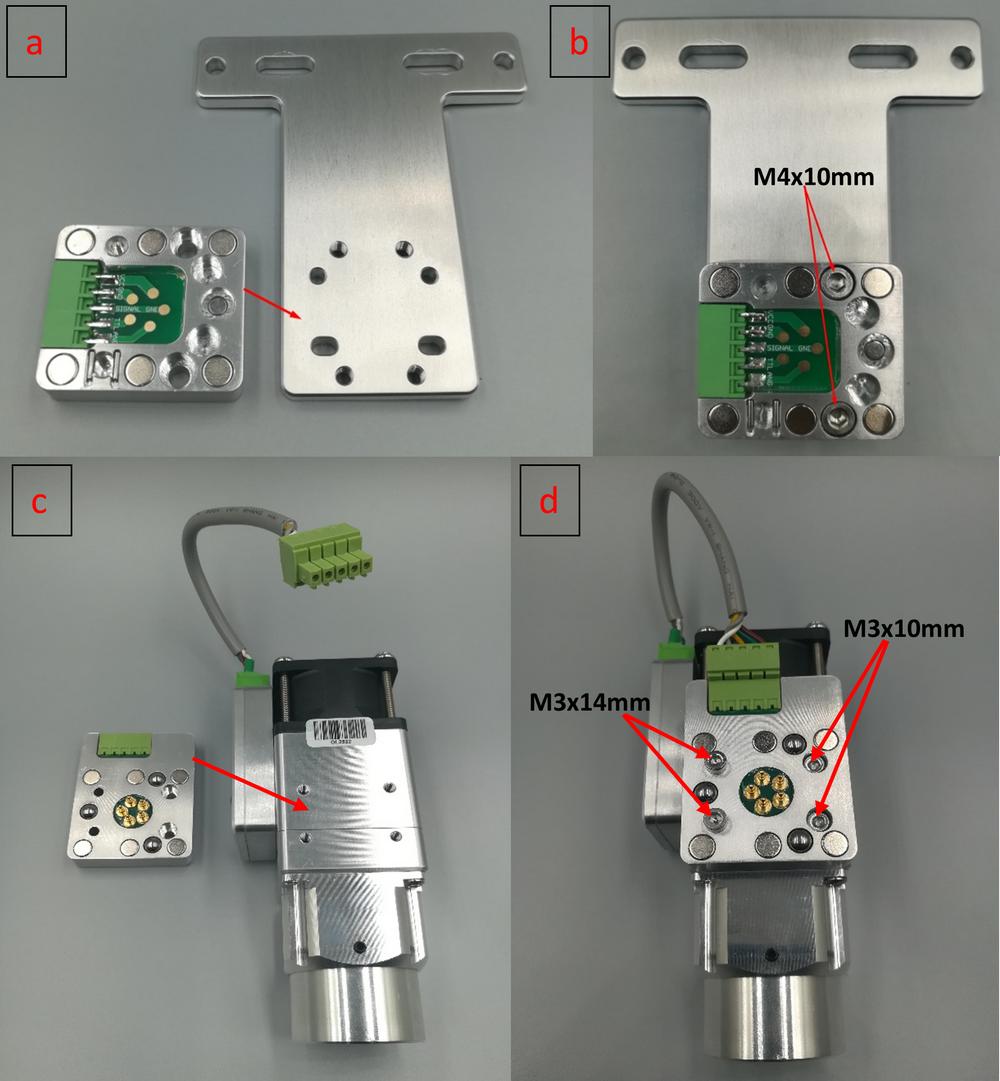
3. Screw one side of the docking station onto the LEAD PLH3D Mount and then sandwich the laser head between the two parts of the docking station as depicted in the steps “a” to “d” below. Finish by screwing the second element of the docking station onto the laser head.
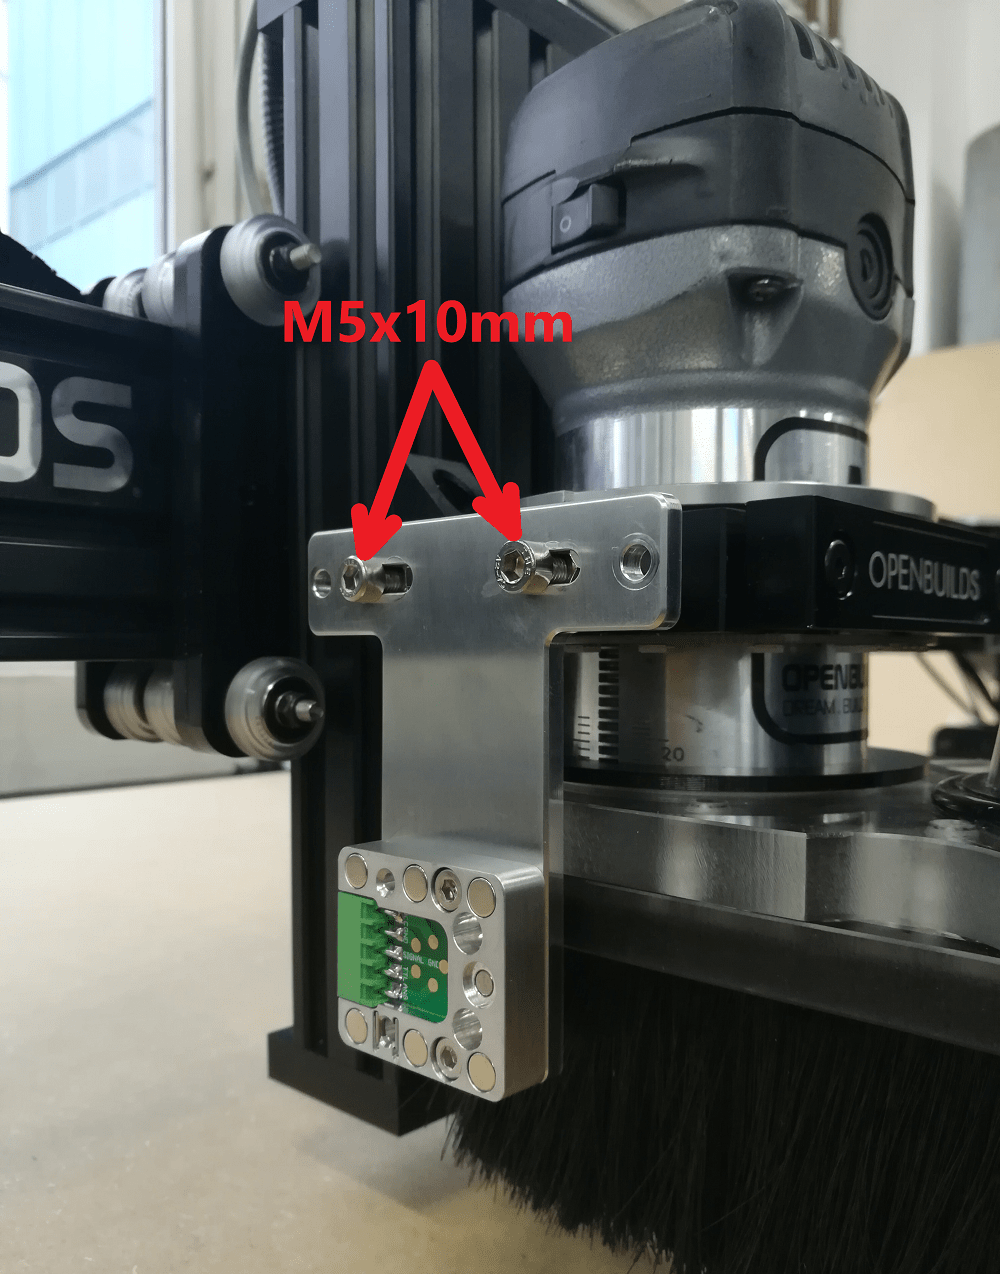
4. Install the LEAD mount (with a relevant element of the docking station) onto the spindle holder. The LEAD mount is designed to be installed on the left, right, or front side of the spindle holder.
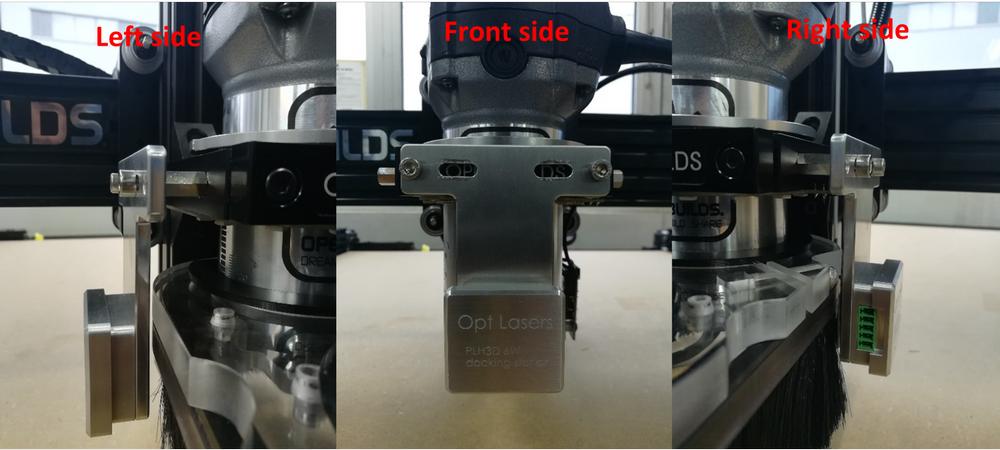
- For mounting the docking station on the front side you have to remove the dust shoe. There is no risk that the laser head would collide with machine parts.
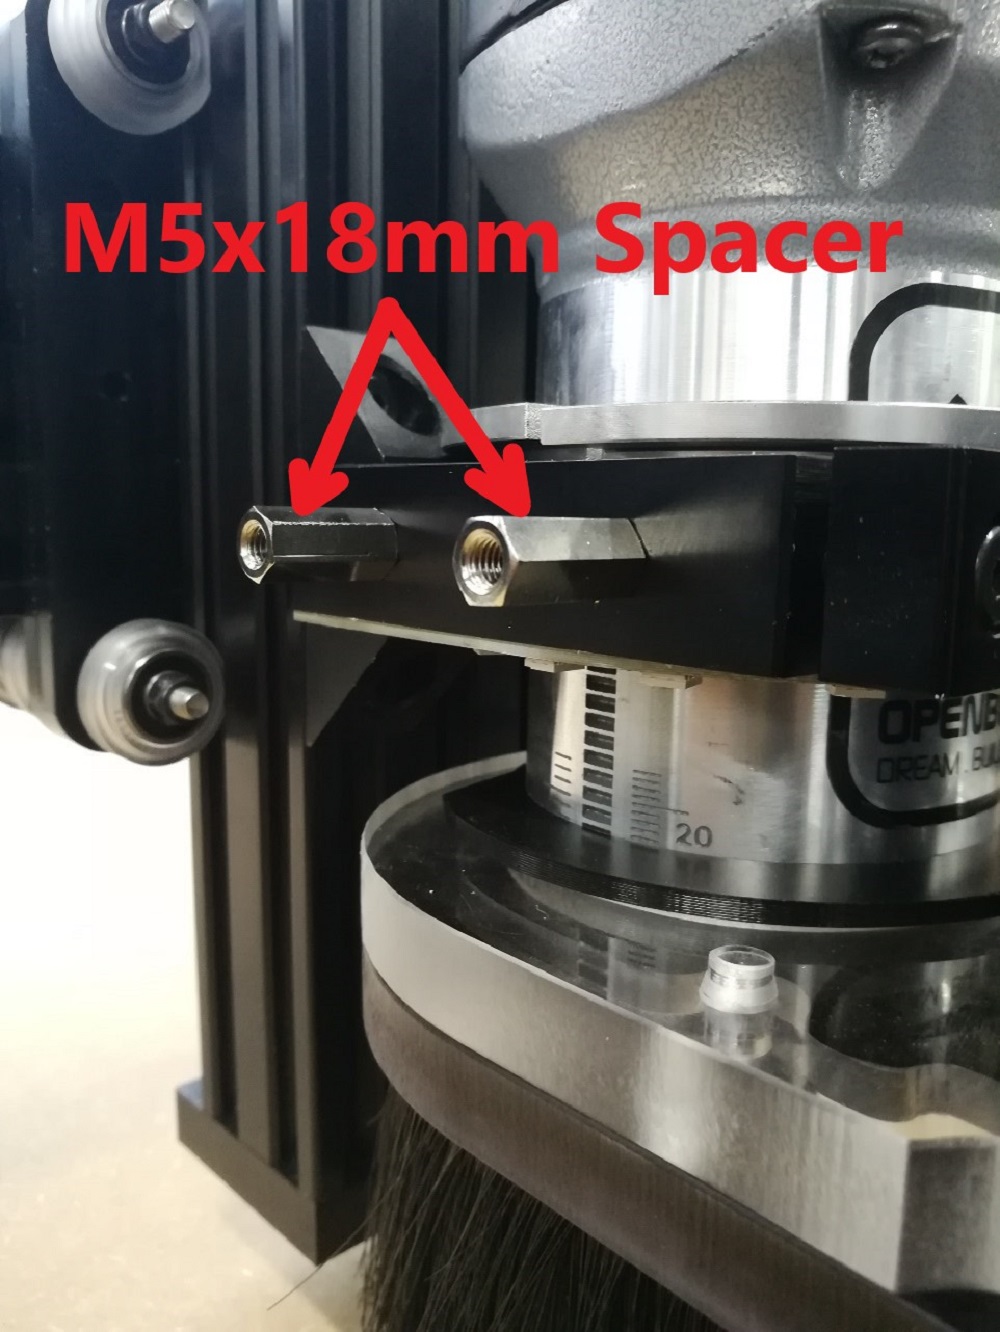
- Use an M5x18mm spacer to be able to install the laser mount without removing the dust shoe (possible only for mounting on the left- and right-hand sides). Mounting the docking station on the left-hand side is the recommended option, because, in this scenario, the laser cable will not face the user. Nevertheless, both left- and right-hand side mounting will decrease the workspace.
- Use an M5x10mm screw to screw the LEAD PLH3D Mount onto the spacers.