Installation and Preparation of Software
- Enter the original Arduino website and download the latest IDE appropriate for your system and then install it.
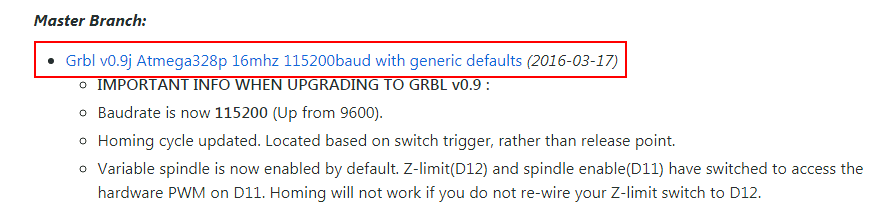
- You’ll need the right version of GRBL, in our case Grbl v0.9j ATmega328P 16MHz 115200baud, which we download from GitHub -> GRBL.
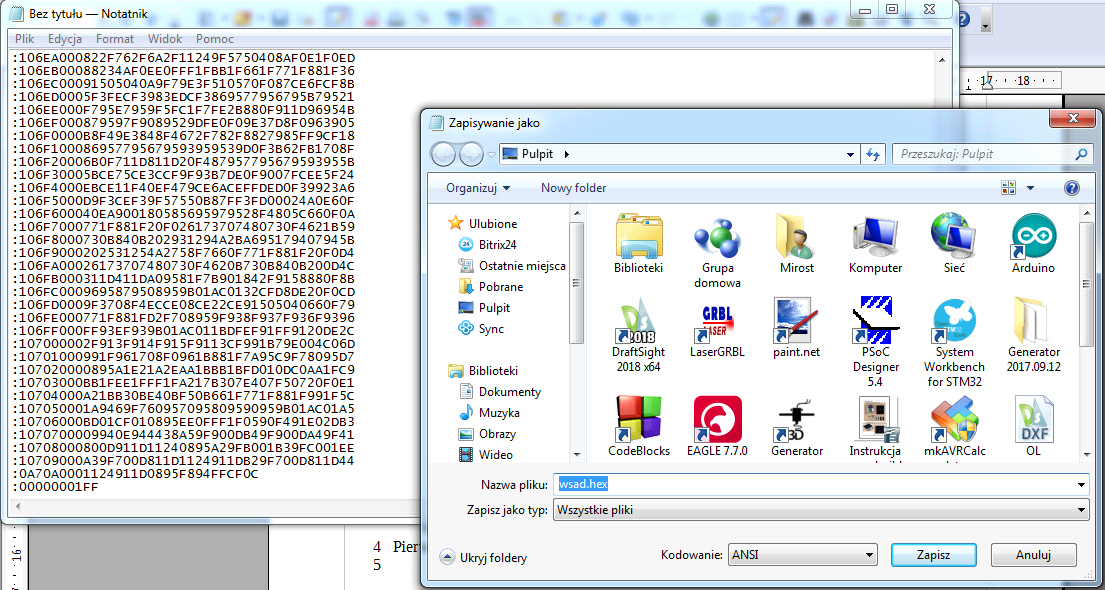
- After clicking on the link, the page with the HEX code will open. We copied everything to the notepad and saved it under the name wsad.hex, selecting the option "all files"
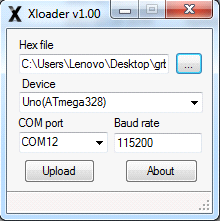
- Next, download the Xloader program from Xloader web-page.
- After connecting the CNC to the PC via the USB cable, run the Xloader program and do the following:
- In the "Hex file" field, specify the path to the previously prepared Hex file
- Specify the device as Uno (ATmega328)
- Set a baud rate of 11520
- Enter the COM port that will be used to connect.
- After completing all the fields, click „Upload.”
- Download the LaserGRBL program from LaserGRBL web-page.
- Install the program and run it.
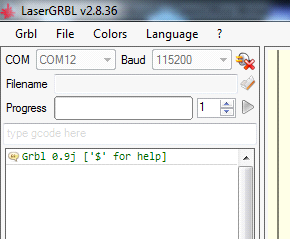
- Select the appropriate COM port, set the baud rate to 11520, and then click Connect.
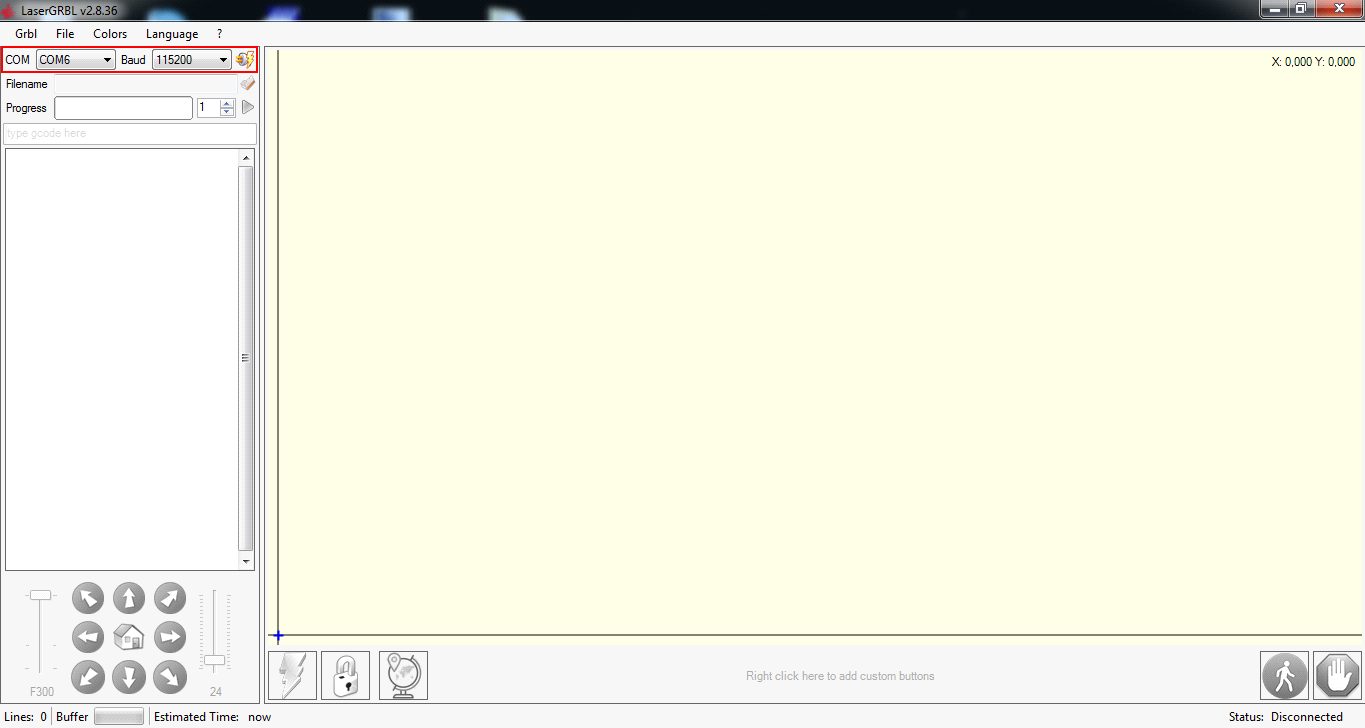
- If everything is working as it should, the machine should present its version of the GRBL and it should be possible to send commands to the machine.
- The next step is to test communication with the machine.
ATTENTION: sending this command should cause the laser head to emit light. It is imperative to take appropriate safety precautions. This is dangerous and there is a possibility of injury if appropriate precautions are not taken.
- To test the communication:
- Click on the field to send the G-code.
- To turn on the laser, enter "M3 S15 G0 X10 Y10."
- To turn off the laser, click on the „lightning” icon in the lower left-hand corner of the screen.
- Reset the position of the laser head by clicking the „home” button.

- If everything is working properly, the laser should turn on and the CNC should perform the appropriate movements. In this case, the next step is to configure the GRBL.
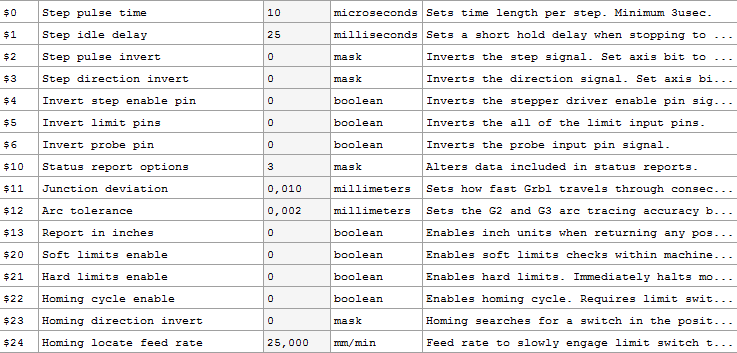
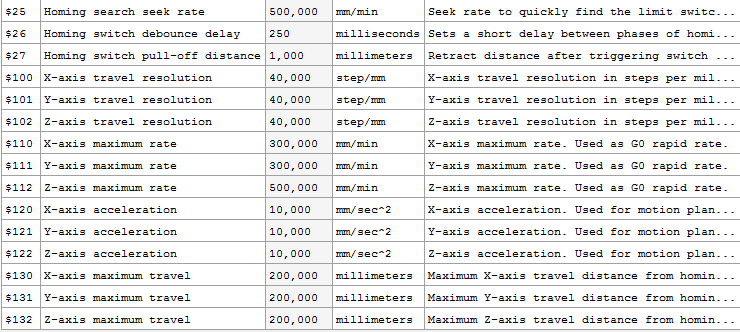
- To configure the GRBL, click on the "GRBL" menu and select "GRBL Configuration.” Enter the values shown in the table below, click "Close" and agree to the changes.